This is not a very authoritative post because I stumbled though this but I think I got it working now on my website :)
Setup your S3 bucket
First setup your S3 bucket, your bucket must be named yourdomain.com e.g. named after your domain
Then if you have a create-react-app setup I add a script in package.json that runs
{
"scripts" : {
"predeploy" : "npm run build" ,
"deploy" : "aws sync --delete build s3://yourdomain.com"
}
}
Then we can run “yarn deploy” and it will automatically upload our create-react-app website to our S3 static site bucket.
Then make sure your bucket has public permissions enabled https://docs.aws.amazon.com/AmazonS3/latest/dev/example-bucket-policies.html#example-bucket-policies-use-case-2. Then make sure your bucket has “static site hosting” enabled too
Setup route 53, and make your NS entries in domains.google.com
I bought a domain with domains.google.com
Google then emailed me to validate my ownership
Then I went to aws.amazon.com route 53 and I created a hosted zone
This generated 4 name server entries and I added those to the domains.google.com site
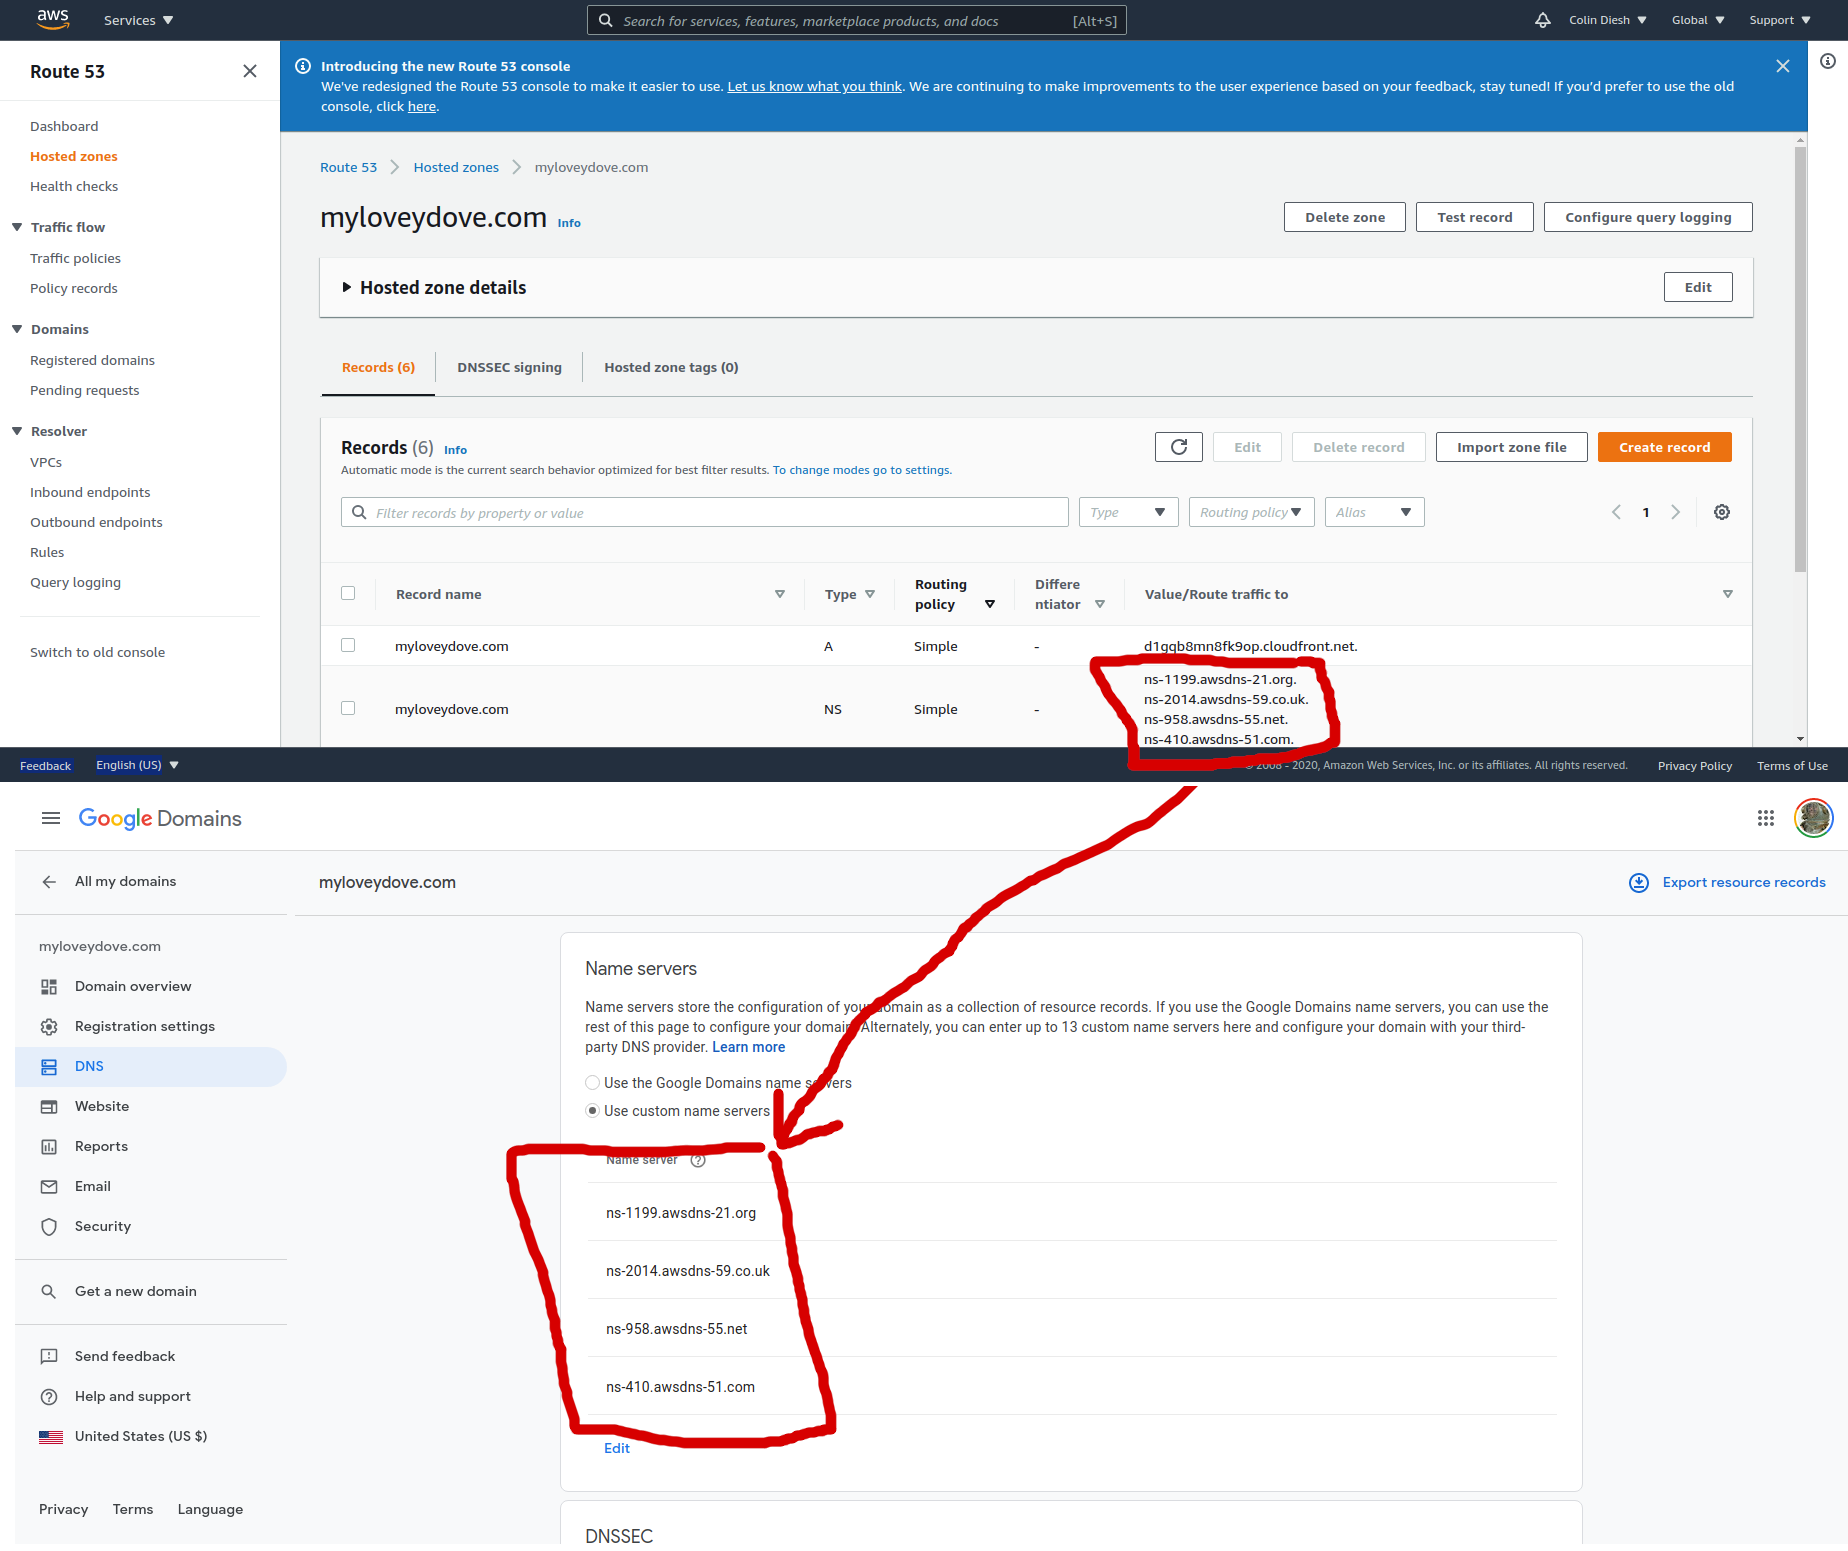
Screenshot shows copying the NS values from route 53 to the name servers area of domains.google.com
Setup your Amazon certificate for making SSL work on CloudFront
To properly setup SSL, you need to go to Amazon Certificates->Provision certificates
We request the certificate for
www.yourdomain.com yourdomain.com
Then it generates some codes for a CNAME value for each of those two entries, and has a button to autoimport those CNAME values to route53
Then it will say “Pending validation”…I waited like an hour and then it changed to “Success”.
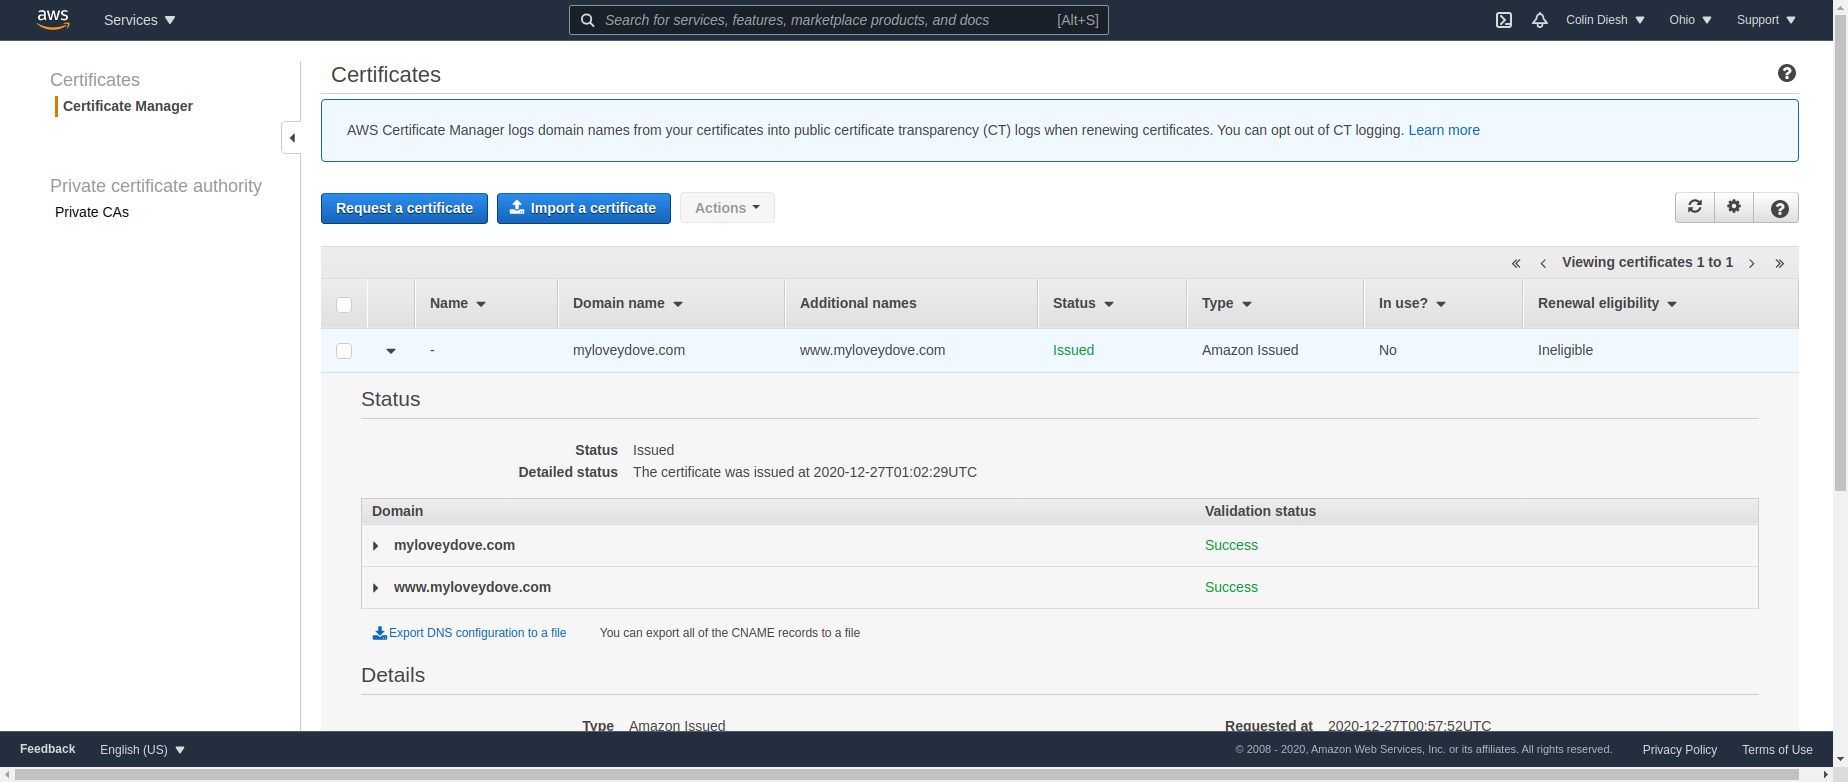
Screenshot shows the now successful Amazon Certificate. After you get this, you can proceed to finishing your cloudfront
Create a CloudFront distribution and add “Alternative CNAME” entries for your domain
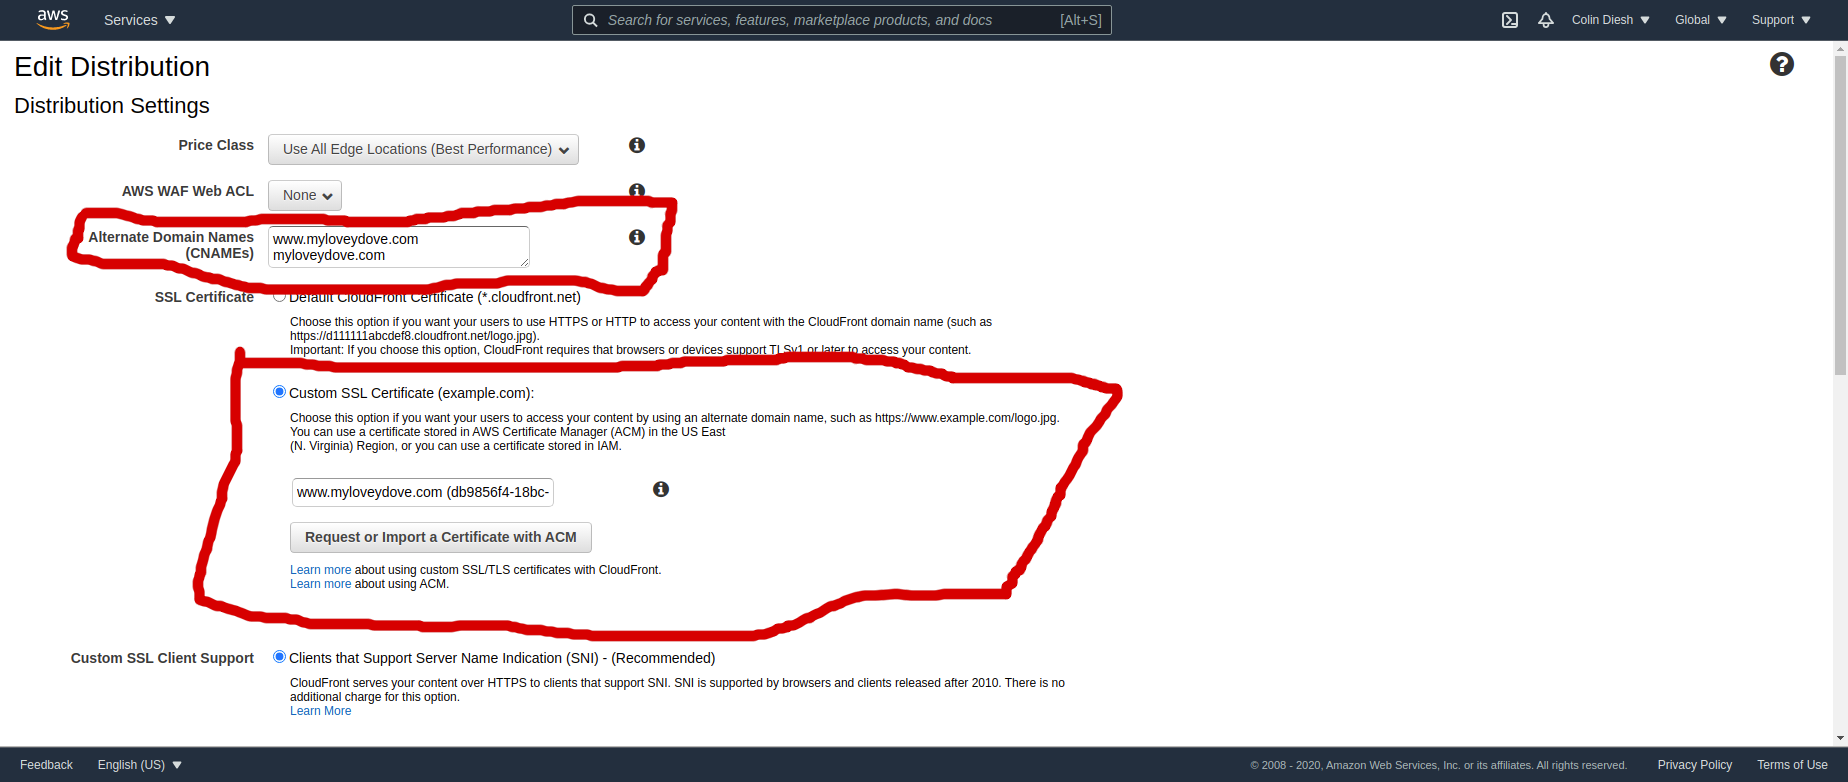
Then we can update our CloudFront distribution and add these to the “Alternative CNAME” input box
yourdomain.com www.yourdomain.com
Note also that I first generated my certificate in us-east-2 but the “Import certificate form” in cloudfront said I had to create it in us-east-1
Add a default object index.html to the CloudFront setting
Make your CloudFront “default object” is index.html
You have to manually type this in :)
Add the CloudFront distribution to your Route 53
Add a Route 53 “A” record that points to the CloudFront domain name e.g. d897d897d87d98dd.cloudfront.net
Summary of steps needed
The general hindsight 20/20 procedure is
- Upload your static content to an S3 bucket called yoursite.com (must be your domain name)
- Make your S3 bucket have the “static website” setting on in the properties menu and add a permissions policy that supports getObject e.g. https://docs.aws.amazon.com/AmazonS3/latest/dev/example-bucket-policies.html#example-bucket-policies-use-case-2
- Create a CloudFront distribution for your website
- Make the CloudFront default object index.html
- Create your domain with domains.google.com or similar
- Point the google domain’s name server to Route 53 NS list from AWS
- Add Route 53 A records that point to the CloudFront domain name e.g. d897d897d87d98dd.cloudfront.net
- Create Amazon issued certificate for yourdomain.com, which can auto-import a validation CNAME to your Route 53
- Make your CloudFront domain support your Alternative CNAME’s e.g. yourdomain.com which requires importing (e.g. selecting from a list that they auto-populate) your Amazon-issued-certificate
Troubleshooting and notes
Problem: Your website gives 403 CloudFront error Solution: You have to get the Alternative CNAME configuration setup (pre-step involves the certificate request and validation)
Problem: Your website gives an object not found error Solution: Set the CloudFront “default object” to index.html
Random comment
This is one of those processes (creating the cloudfront/route 53) that probably could have done with the aws-sam CLI and it would have possibly been easier, it is quite fiddly doing all these steps in the web interface